

Binged: Your Movie Watch Tracker Built Using Ruby On Rails
Step By Step Tutorial To build Movie Watch Tracker Using Ruby On Rails


I personally do watch Movies, Web series, TV shows, Sports, etc... The consumption of online video content increased drastically, especially during the pandemic considering more people working from home. In this post, I will explain how to build a basic Binge-Watch Tracker to track the progress of all your movies.
For this tutorial, I will be using
- Ruby 2.6.3
- Rails 5.2.6
- Bootstrap 5
- SQLite Database
But this step-by-step tutorial should work for the latest Ruby & Rails versions as well.
Index
- Create a project
- Start server
- Create Model, Controller and Views
- Database Migration
- Change Application Root
- Integrate Bootstrap
- Add Navigation Bar
- Add Movie status Select option
- Styling Course Forms
Create a project
- Let's name our project as
binged- The Binge-Watch Tracker
rails new binged
This command will create a project binged with the following structure.
cd binged/
.
├── Gemfile
├── Gemfile.lock
├── README.md
├── Rakefile
├── app
├── bin
├── config
├── config.ru
├── db
├── lib
├── log
├── package.json
├── public
├── storage
├── test
├── tmp
└── vendor

11 directories, 6 files
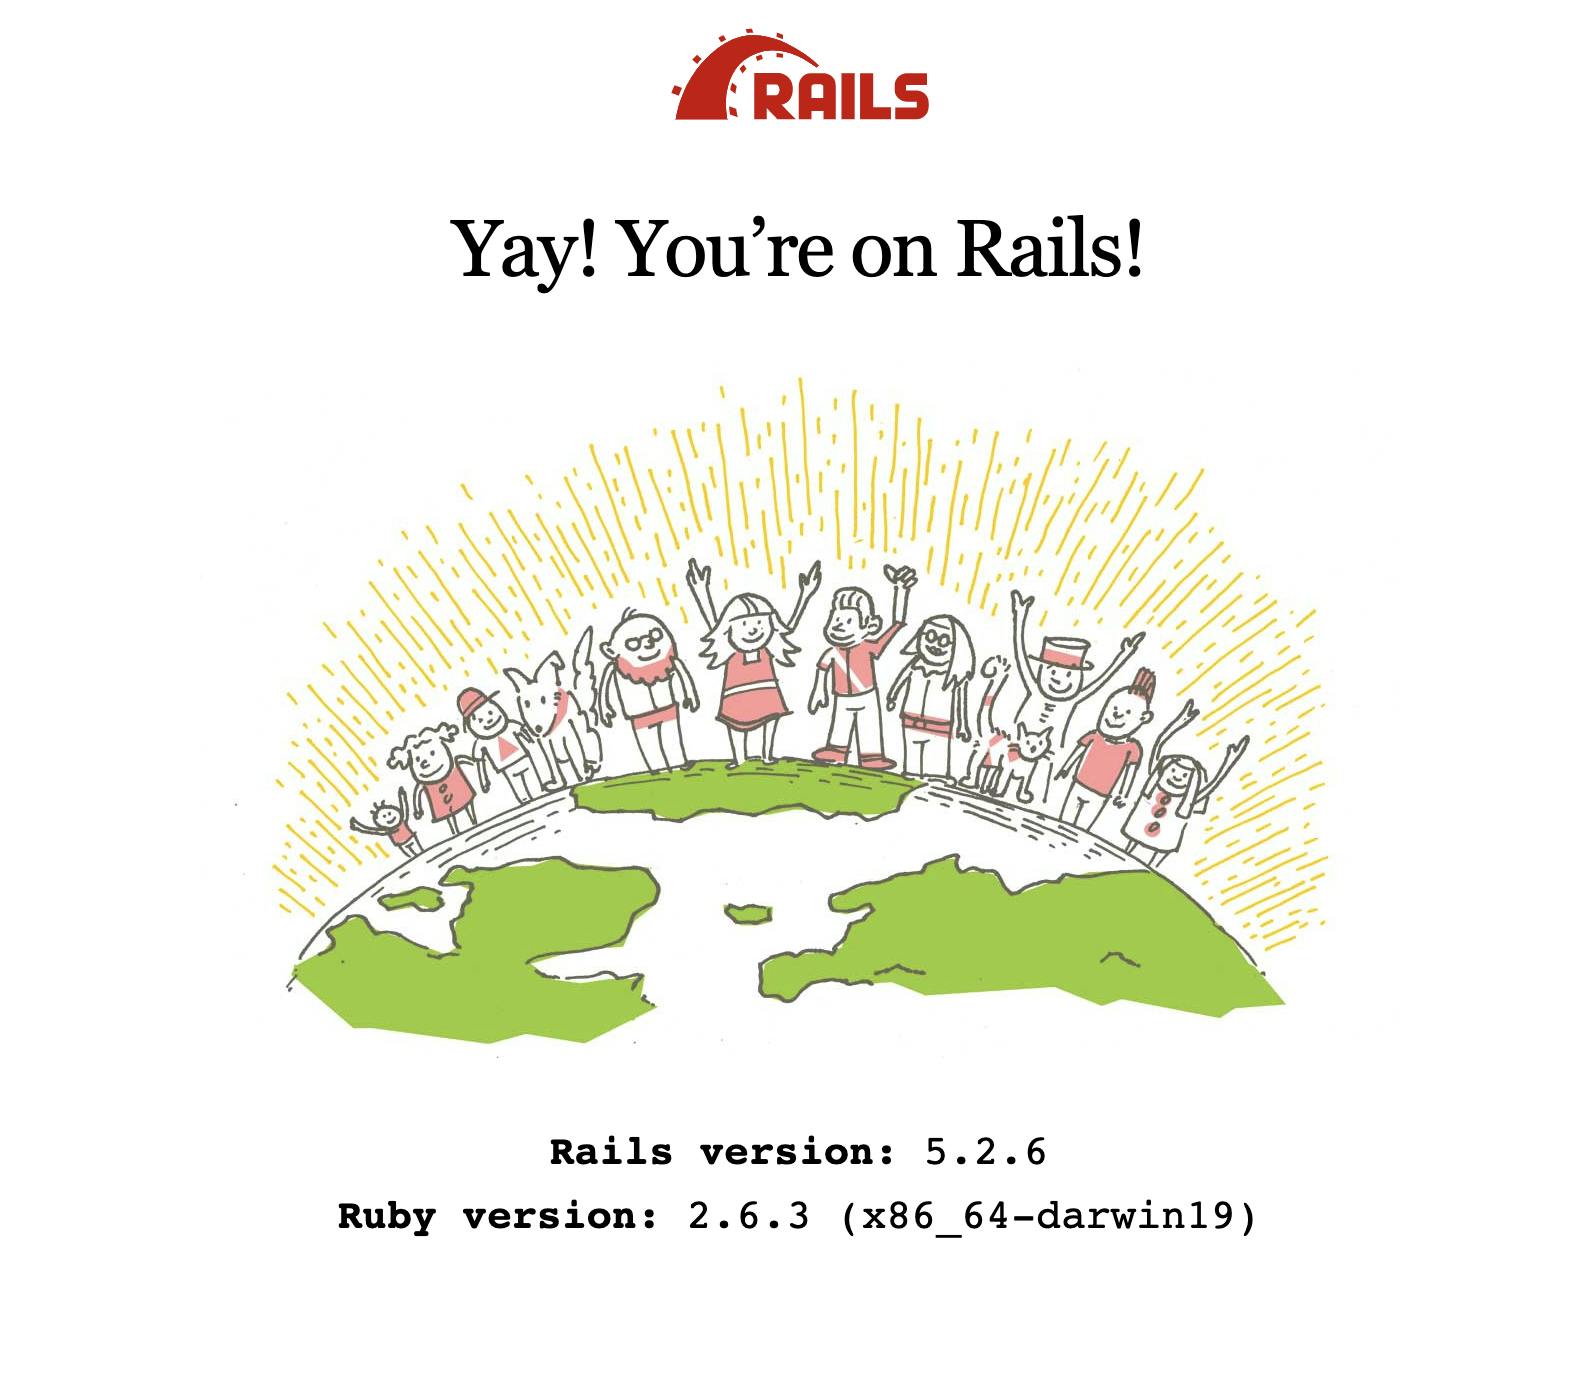
Start server
- Run
rails serverorrails s(shortcut) to start the server and visithttp://localhost:3000in your browser. If there are no errors you will see the following screen.
Create Model, Controller, and Views
Let's create a Movie Model and corresponding Controller using rails scaffold.
A scaffold in Rails is a full set of models, database migration for that model, a controller to manipulate it, views to view and manipulate the data, and a test suite for each of the above. Our Movie model will have the following fields
- title - string
- image_url - string
- trailer_url - string
- movie_url - string
- status - integer (As this will be an enum with values
yet_to_watch,watching,watched) - release_date - datetime
- watched_date - datetime
rails g scaffold Movie title:string image_url:string trailer_url:string movie_url:string status:integer release_date:datetime watched_date:datetime
This will generate the following files with Course Model, Views & Controller.
      invoke  active_record
      create    db/migrate/20210819042947_create_movies.rb
      create    app/models/movie.rb
      invoke    test_unit
      create      test/models/movie_test.rb
      create      test/fixtures/movies.yml
      invoke  resource_route
       route    resources :movies
      invoke  scaffold_controller
      create    app/controllers/movies_controller.rb
      invoke    erb
      create      app/views/movies
      create      app/views/movies/index.html.erb
      create      app/views/movies/edit.html.erb
      create      app/views/movies/show.html.erb
      create      app/views/movies/new.html.erb
      create      app/views/movies/_form.html.erb
      invoke    test_unit
      create      test/controllers/movies_controller_test.rb
      create      test/system/movies_test.rb
      invoke    helper
      create      app/helpers/movies_helper.rb
      invoke      test_unit
      invoke    jbuilder
      create      app/views/movies/index.json.jbuilder
      create      app/views/movies/show.json.jbuilder
      create      app/views/movies/_movie.json.jbuilder
      invoke  assets
      invoke    coffee
      create      app/assets/javascripts/movies.coffee
      invoke    scss
      create      app/assets/stylesheets/movies.scss
      invoke  scss
      create    app/assets/stylesheets/scaffolds.scss
Database Migration
- Scaffold command also generated database migration for creating
Movietable atdb/migrate/20210819042947_create_movies.rb
class CreateMovies < ActiveRecord::Migration[5.2]
  def change
    create_table :movies do |t|
      t.string :title
      t.string :image_url
      t.string :trailer_url
      t.string :movie_url
      t.integer :status
      t.datetime :release_date
      t.datetime :watched_date

      t.timestamps
    end
  end
end
- Let's execute database migration using
rails db:migratecommand.
➜  binged git:(master) ✗ rails db:migrate
== 20210819042947 CreateMovies: migrating =====================================
-- create_table(:movies)
   -> 0.0008s
== 20210819042947 CreateMovies: migrated (0.0008s) ============================
Change Application Root
- Now our migration is completed. Let's point our application home page to the
Movie#Indexpage. - Update
config/routes.rbto point root to course controller index action.
Rails.application.routes.draw do
  resources :movies
  root 'movies#index'
end
Integrate Bootstrap
- Import Bootstrap CSS and dependent js files in
app/views/layouts/application.html.erb
<!DOCTYPE html>
<html>
  <head>
    <%= csrf_meta_tags %>
    <%= csp_meta_tag %>

    <%= stylesheet_link_tag    'application', media: 'all', 'data-turbolinks-track': 'reload' %>
    <%= javascript_include_tag 'application', 'data-turbolinks-track': 'reload' %>

    <!-- Required meta tags -->
    <meta charset="utf-8">
    <meta name="viewport" content="width=device-width, initial-scale=1">

    <!-- Bootstrap CSS -->
    <link href="https://cdn.jsdelivr.net/npm/bootstrap@5.0.1/dist/css/bootstrap.min.css" rel="stylesheet" integrity="sha384-+0n0xVW2eSR5OomGNYDnhzAbDsOXxcvSN1TPprVMTNDbiYZCxYbOOl7+AMvyTG2x" crossorigin="anonymous">

    <title>Binged - Movie Tracker</title>

  </head>

  <body>
    <div class="container">
     <%= yield %>
    </div>
    <!-- Option 1: Bootstrap Bundle with Popper -->
    <script src="https://cdn.jsdelivr.net/npm/bootstrap@5.0.1/dist/js/bootstrap.bundle.min.js" integrity="sha384-gtEjrD/SeCtmISkJkNUaaKMoLD0//ElJ19smozuHV6z3Iehds+3Ulb9Bn9Plx0x4" crossorigin="anonymous"></script>
  </body>
</html>
Add Navigation Bar
Let's add a navigation bar to all pages. Adding this in the application layout will take care of loading the navigation bar on all web pages.
create file
app/views/layouts/_navbar.html.erbwith the following HTML content.
<style>
  .theme-color {
    background-color: #800080;
  }
  .theme-btn {
    border-color: #800080;
  }
</style>

<nav class="navbar navbar-expand-lg navbar-dark theme-color">
  <div class="container-fluid">
    <a class="navbar-brand" href="/">Binged</a>
    <button class="navbar-toggler" type="button" data-bs-toggle="collapse" data-bs-target="#navbarNavAltMarkup" aria-controls="navbarNavAltMarkup" aria-expanded="false" aria-label="Toggle navigation">
      <span class="navbar-toggler-icon"></span>
    </button>
    <div class="collapse navbar-collapse" id="navbarNavAltMarkup">
      <div class="navbar-nav">
        <a class="nav-link active" aria-current="page" href="/movies">Movies</a>
      </div>
    </div>
  </div>
</nav>
- Now render this
navbarinapp/views/layouts/application.html.erb. Add<%= render 'layouts/navbar' %>in application layout<body>as follows.
<body>
    <%= render 'layouts/navbar' %>
    <div class="container">
     <%= yield %>
    </div>
    ..
    ..
</body>
Add Movie status Select option
We have the status field in the Movie Model. Now we want this to have only 2 values for this.
yet_to_watch- use this status if u are yet to watch the movie and it is on your wishlist.watching- use this status if u are currently watching the movie.watched- use this status if u already watched the movie.Let's add
statusenum inapp/models/movie.rbas follows.
class Movie < ApplicationRecord
  enum status: [:yet_to_watch, :watching, :watched]
end
- After adding the
statusfield asenumnow you can queryMoviesbystatusas follows which will query movies by status.
➜  binged git:(master) ✗ rails c
Running via Spring preloader in process 78801
Loading development environment (Rails 5.2.6)
irb(main):001:0> Movie.yet_to_watch
  Movie Load (0.4ms)  SELECT  "movies".* FROM "movies" WHERE "movies"."status" = ? LIMIT ?  [["status", 0], ["LIMIT", 11]]
=> #<ActiveRecord::Relation []>
irb(main):002:0> Movie.watched
  Movie Load (0.1ms)  SELECT  "movies".* FROM "movies" WHERE "movies"."status" = ? LIMIT ?  [["status", 2], ["LIMIT", 11]]
=> #<ActiveRecord::Relation []>
- Update the
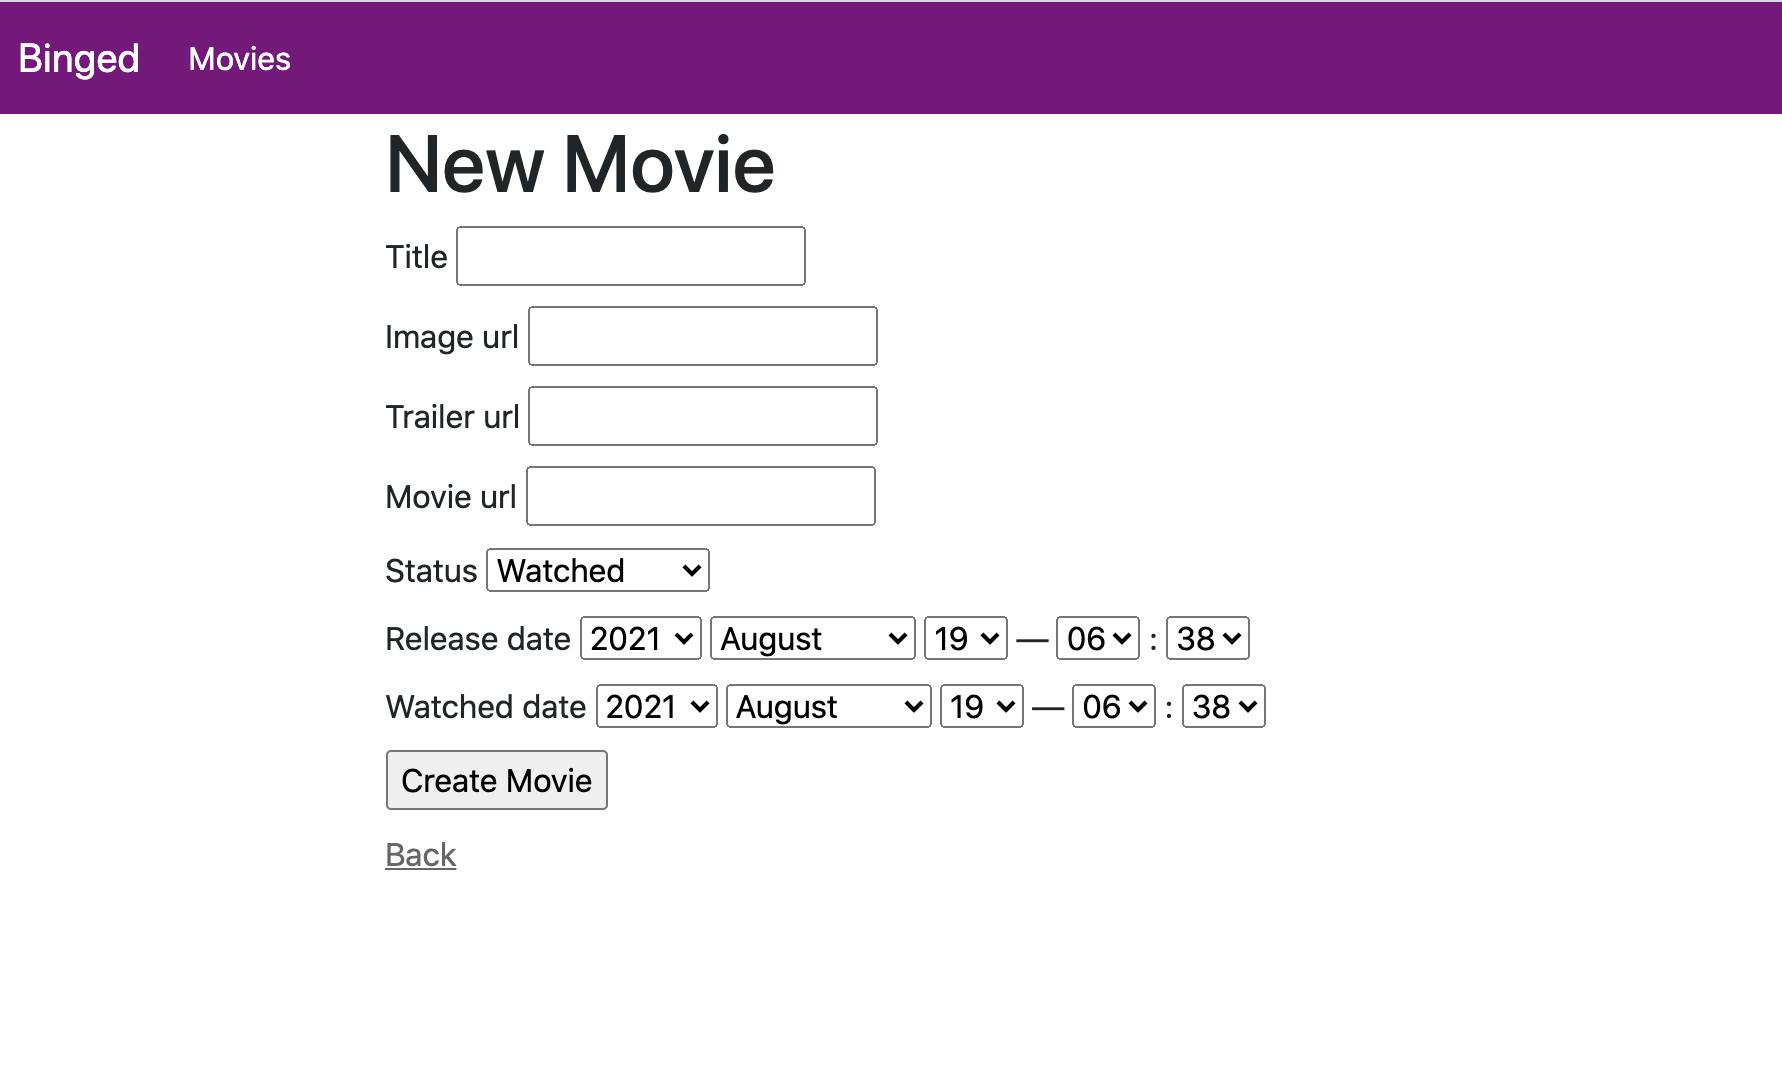
statusform field toselectinapp/views/movies/_form.html.erb
  <div class="field">
    <%= form.label :status %>
    <%= form.select :status, Movie.statuses.keys.map { |s| [s.humanize, s]} %>
  </div>
- After adding the above changes your create form will look like this
http://localhost:3000/movies/new
Styling Course Forms
Now we will add styling to our Movie Index, Create, Edit forms.
1. Add Styles to Edit/Create Form
- Change
app/views/movies/_form.html.erbto the following HTML.
<%= form_with(model: movie, local: true) do |form| %>
  <% if movie.errors.any? %>
    <div id="error_explanation">
      <h2><%= pluralize(movie.errors.count, "error") %> prohibited this movie from being saved:</h2>

      <ul>
      <% movie.errors.full_messages.each do |message| %>
        <li><%= message %></li>
      <% end %>
      </ul>
    </div>
  <% end %>

  <div class="field">
    <%= form.label :title %>
    <%= form.text_field :title , class: "form-control" %>
  </div>

  <div class="field">
    <%= form.label :image_url %>
    <%= form.text_field :image_url, class: "form-control"  %>
  </div>

  <div class="field">
    <%= form.label :trailer_url %>
    <%= form.text_field :trailer_url, class: "form-control"  %>
  </div>

  <div class="field">
    <%= form.label :movie_url %>
    <%= form.text_field :movie_url , class: "form-control" %>
  </div>

  <div class="field">
    <%= form.label :status %>
    <%= form.select :status, Movie.statuses.keys.map { |s| [s.humanize, s]} , class: "form-select" %>
  </div>

  <div class="field">
    <%= form.label :release_date %>
    <%= form.datetime_select :release_date , class: "form-control"  %>
  </div>

  <div class="field">
    <%= form.label :watched_date %>
    <%= form.datetime_select :watched_date , class: "form-control" %>
  </div>

  <div class="actions">
    <%= form.submit 'Submit' , class: "btn btn-primary theme-color" %>
  </div>
<% end %>
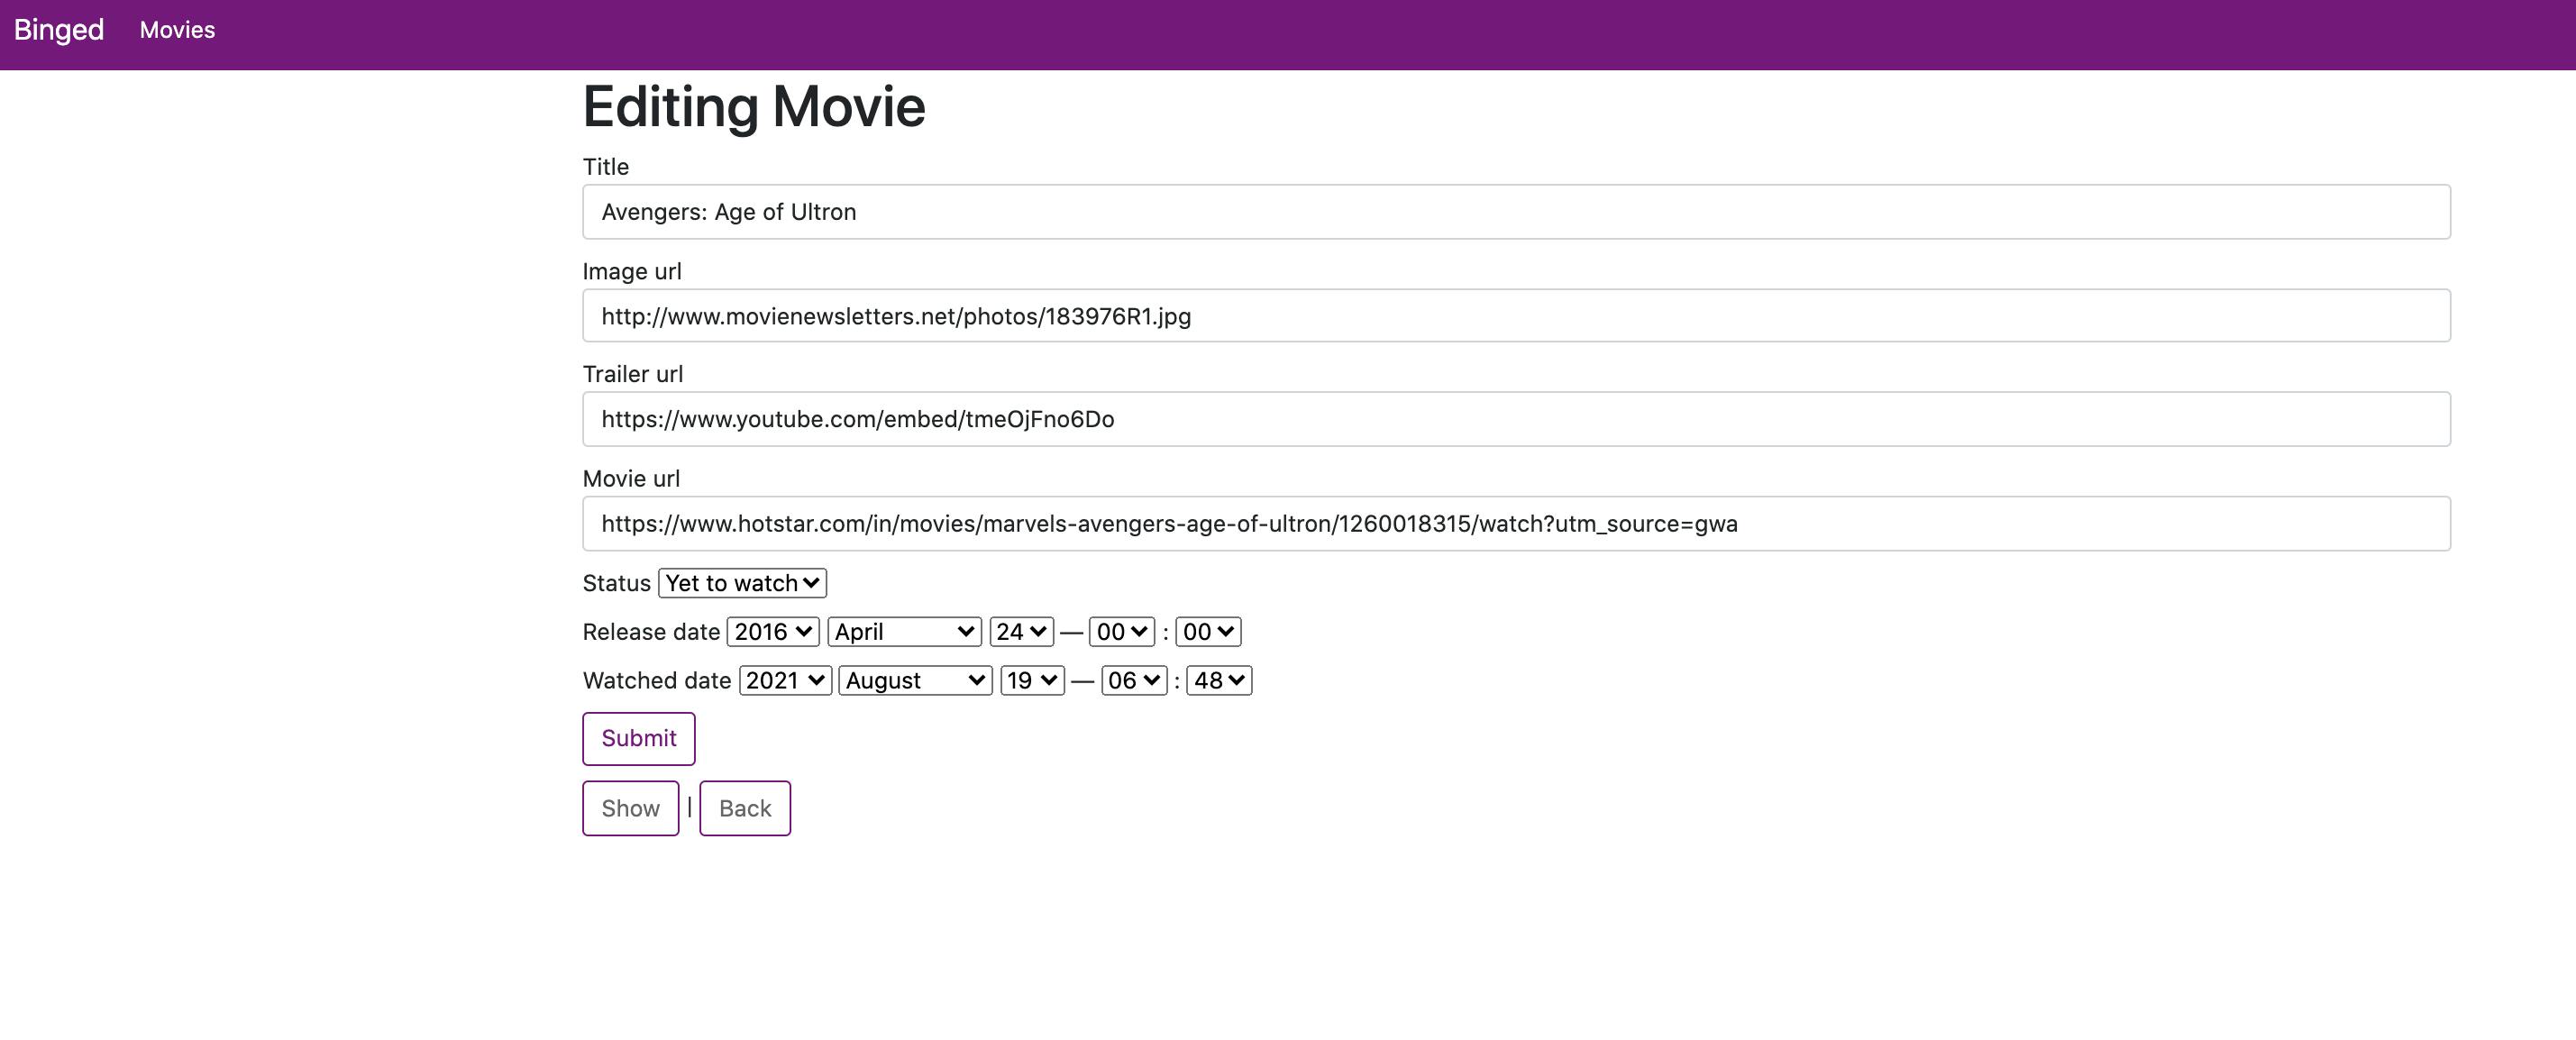
- Change
app/views/movies/edit.html.erbto the following HTML.
<h1>Editing Movie</h1>

<%= render 'form', movie: @movie %>

<%= link_to 'Show', @movie , class: "btn btn-primary theme-color"%> |
<%= link_to 'Back', movies_path , class: "btn btn-primary theme-color"%>
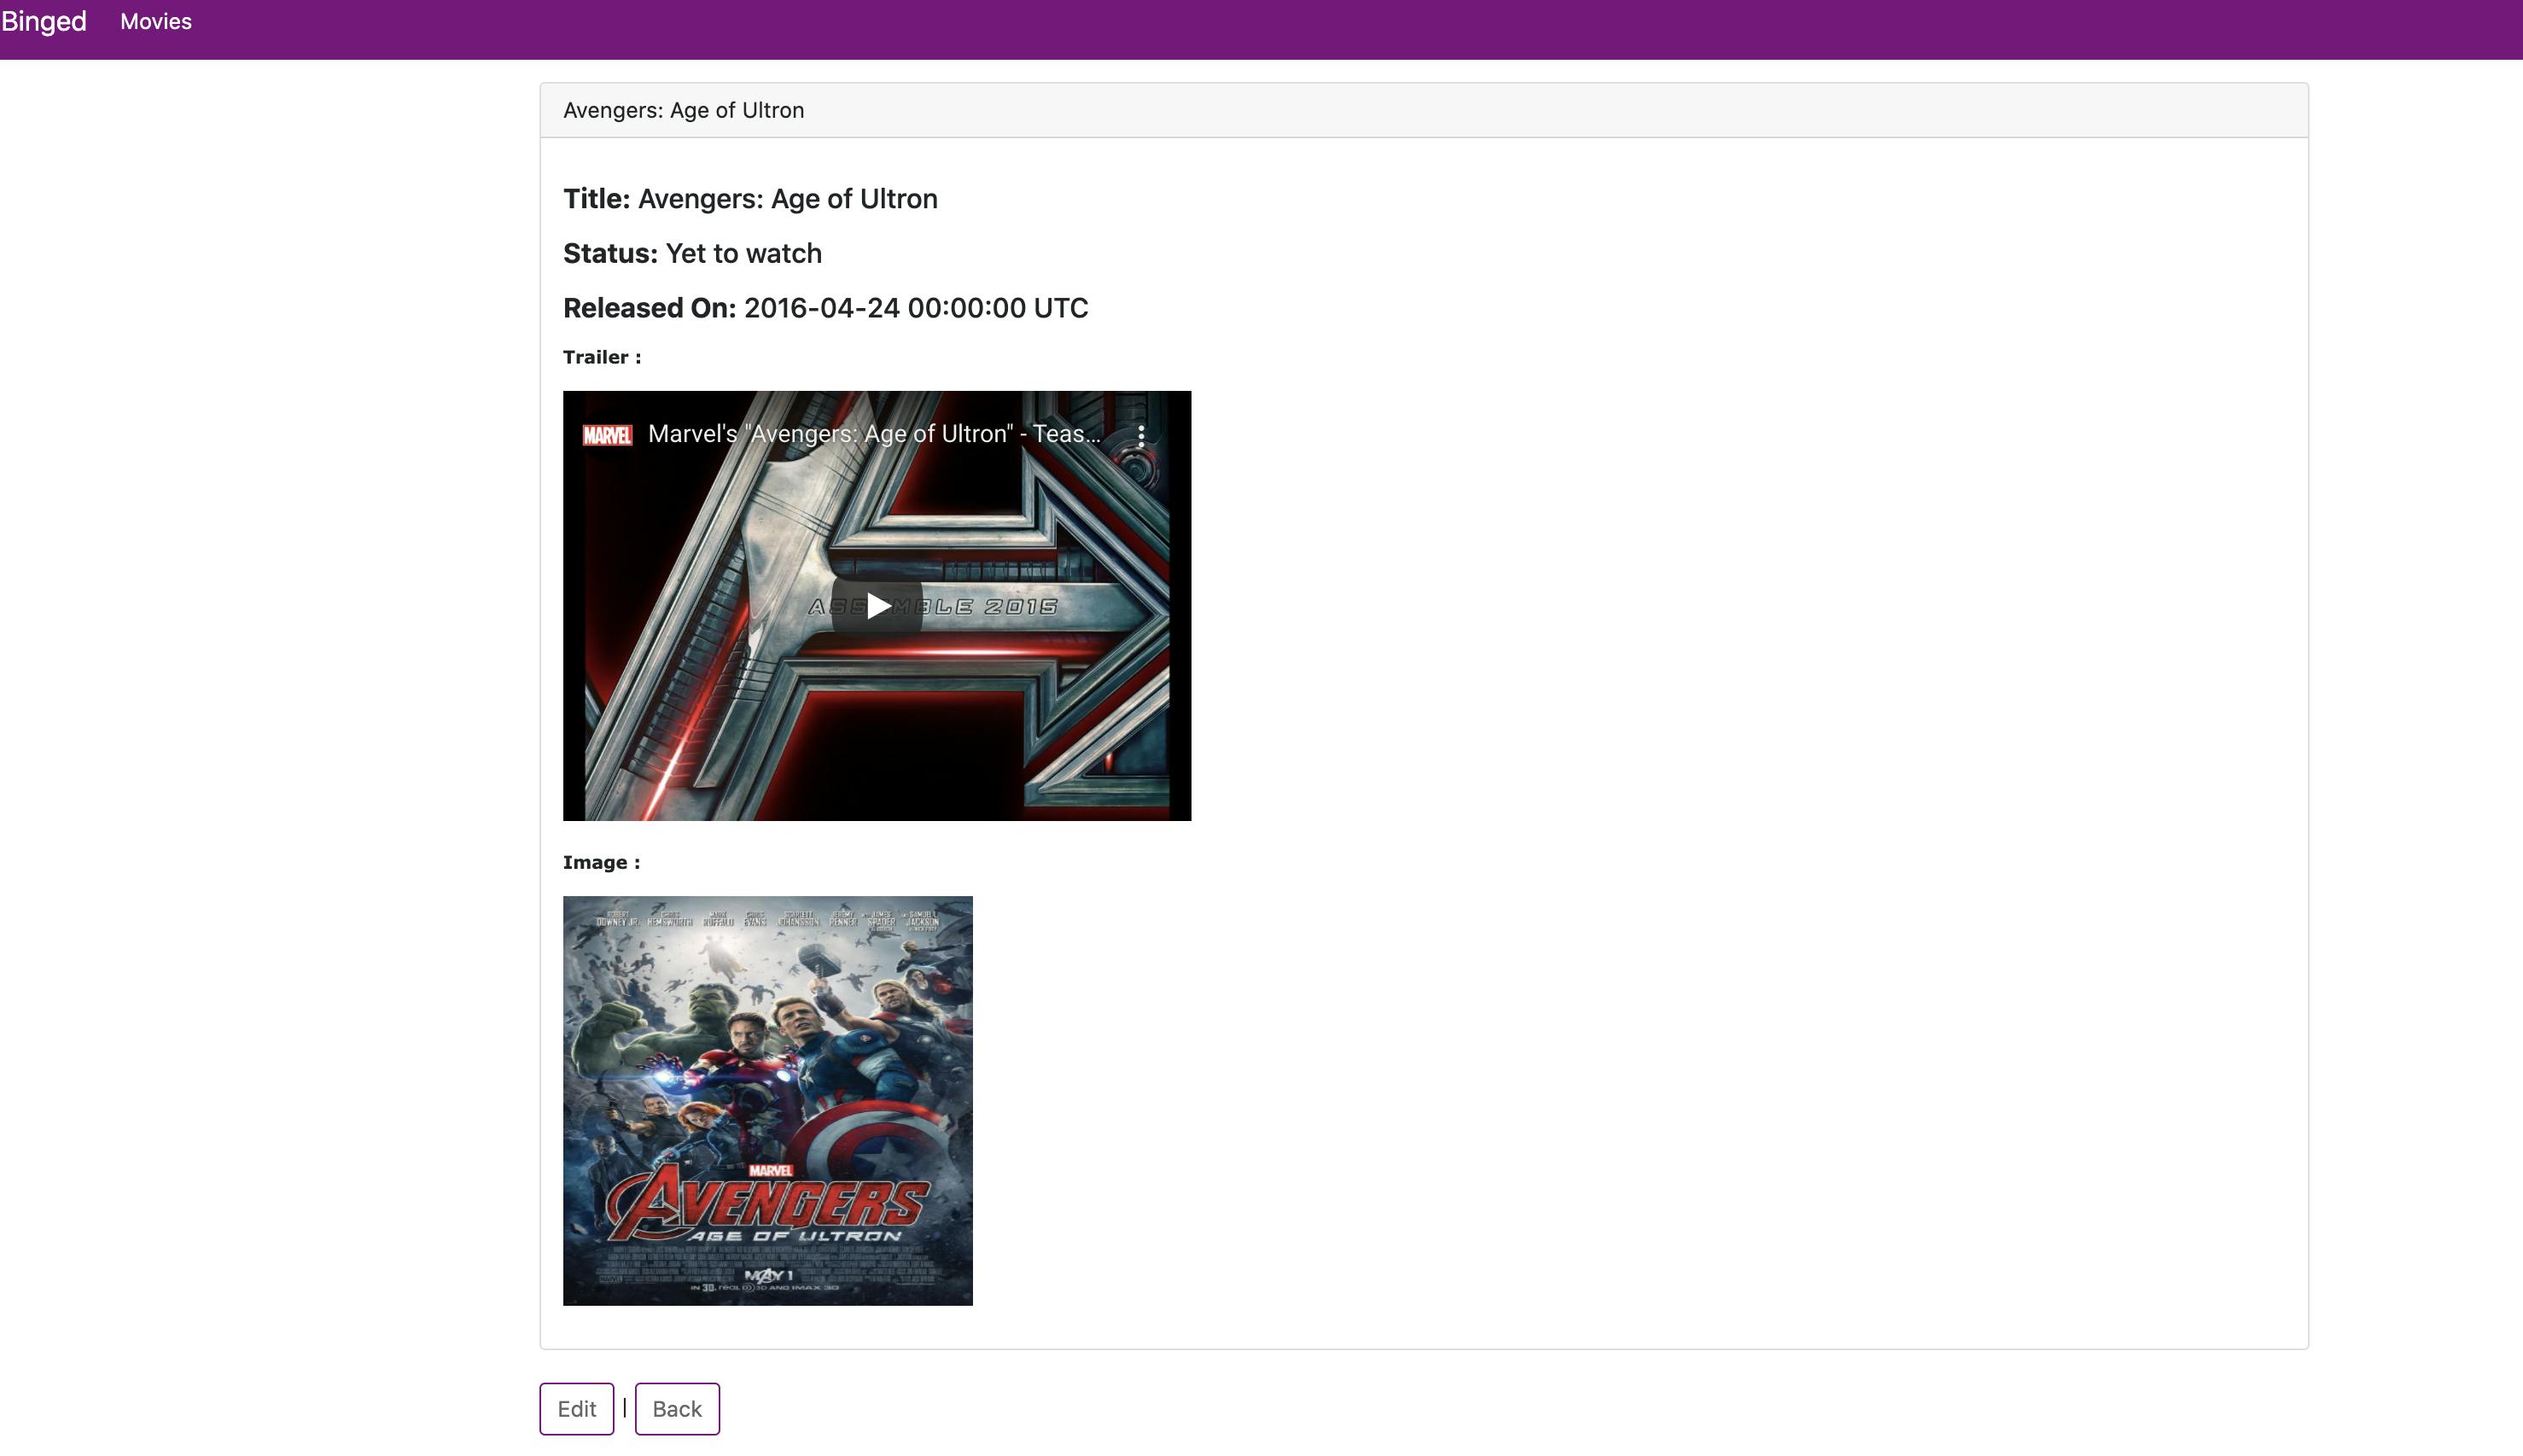
After styling, Edit Movie Form Looks like this.
2. Add Styles to Show Form
- Change
app/views/movies/show.html.erbto the following HTML.
<p id="notice"><%= notice %></p>

<br/> <br/>

<div class="card">
  <div class="card-header">
    <%= @movie.title %>
  </div>

  <div class="card-body">
    <p>
      <h5 class="card-title">
        <strong>Title:</strong>
        <%= @movie.title %>
      </h5>
    </p>

    <p>
      <h5 class="card-title">
        <strong>Status:</strong>
        <%= @movie.status.humanize %>
      </h5>
    </p>

    <p>
      <h5 class="card-title">
        <strong>Released On:</strong>
        <%= @movie.release_date.to_formatted_s %>
      </h5>
    </p>

    <% if @movie.watched? %>
      <p>
        <h5 class="card-title">
          <strong>Watched On:</strong>
          <%= @movie.watched_date.to_formatted_s %>
        </h5>
      </p>
    <% end %>

    <p>
      <strong>Trailer : </strong>
      <h5 class="card-title">
          <iframe width="560" height="315" src="<%= @movie.trailer_url %>" title="YouTube video player" frameborder="0" allow="accelerometer; autoplay; clipboard-write; encrypted-media; gyroscope; picture-in-picture" allowfullscreen></iframe>
      </h5>
    </p>

    <p>
      <strong>Image : </strong>
      <h5 class="card-title">
        <img  width="600" height="600" src="<%= @movie.image_url %>"/>
      </h5>
    </p>

  </div>
</div>

<br/>

<%= link_to 'Edit', edit_movie_path(@movie) , class: "btn btn-outline-primary theme-btn"%> |
<%= link_to 'Back', movies_path , class: "btn btn-outline-primary theme-btn"%>

<br/><br/>
- After styling, Show Movie Form Looks like this.
3. Add Styles to the movies List page
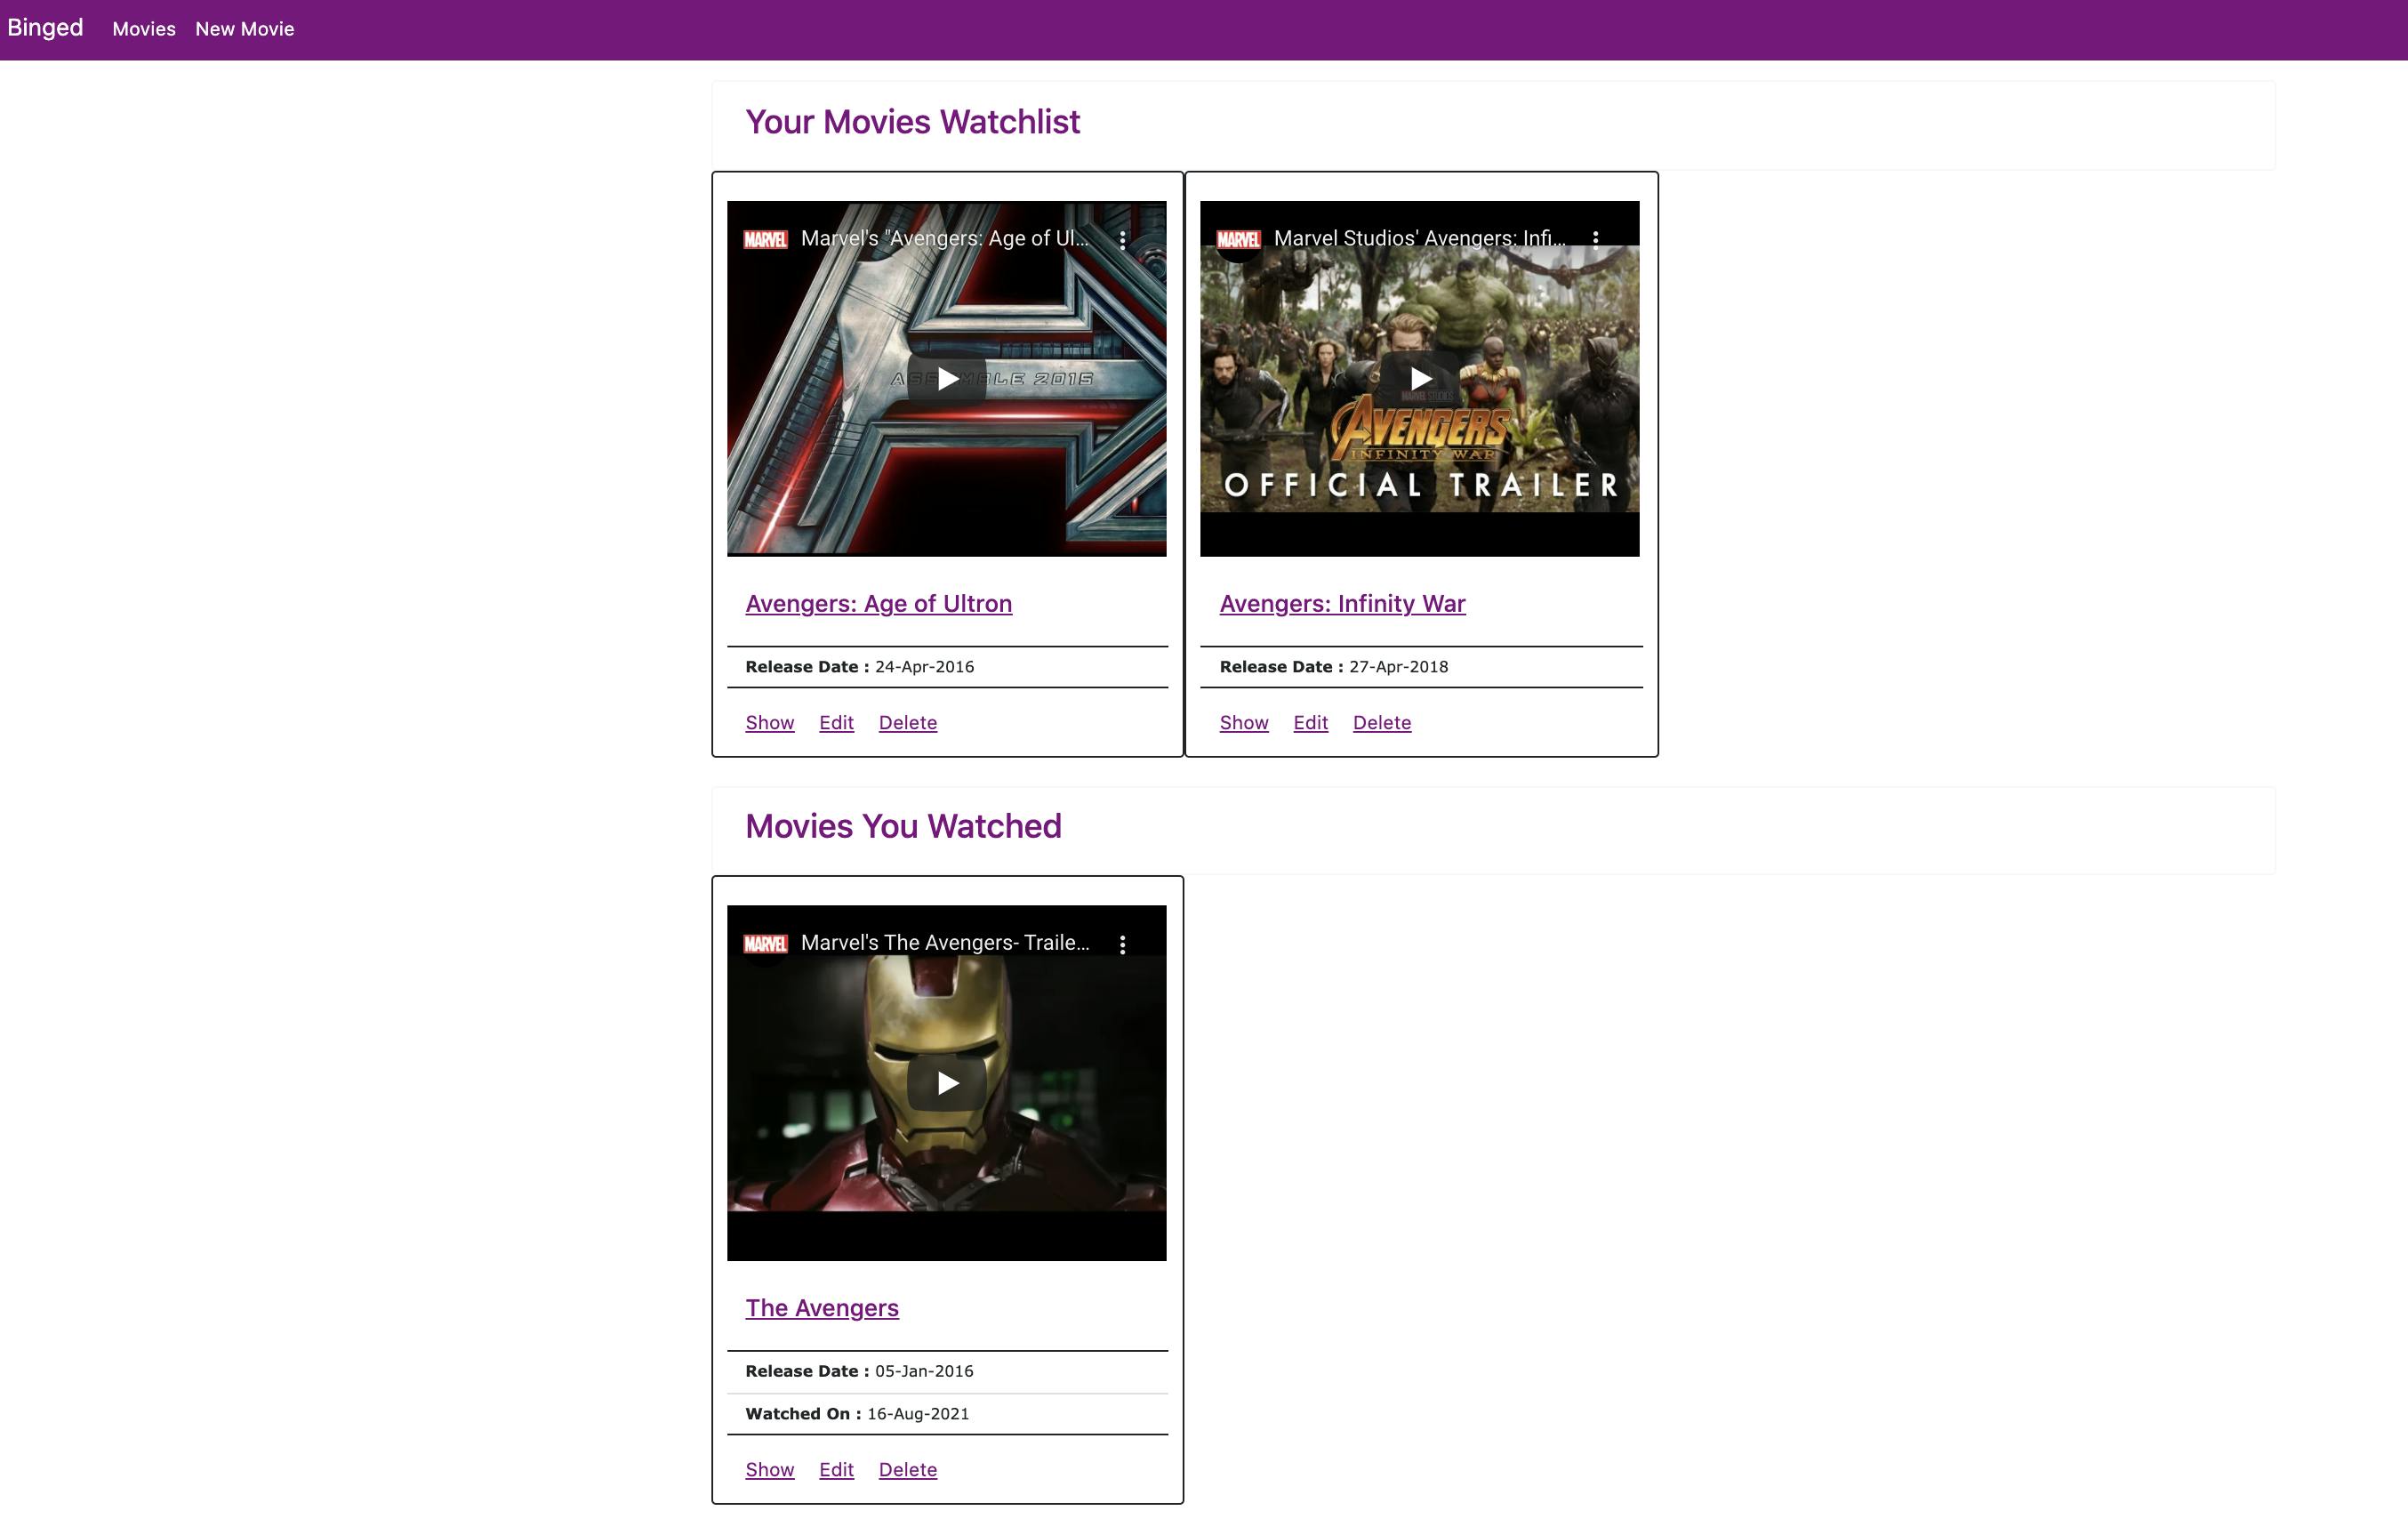
Now we reached the final stage of our project. We just need to style our Home page. i.e Movies Listing Page.
Create a new file
app/views/movies/_card_section_title.html.erbwith the following HTML.
<div class="row">
    <div class="card border-light" >
      <div class="card-body">
        <h3 class="card-title" style="color: #800080;"><%= section %></h3>
      </div>
    </div>
</div>
<br/>
- Create a new file
app/views/movies/_movie_cards.html.erbwith the following HTML.
<div class="row row-cols-1 row-cols-md-4 g-4">
  <% movies.each do |movie| %>
    <div class="card border-dark">
      <img src="<%= movie.image_url %>" class="card-img-top" alt="<%= movie.title %>">
      <div class="card-body">
        <h5 class="card-title"><a href="<%= movie.movie_url%>" style="color: #800080;"><%= movie.title %></a></h5>
      </div>
      <ul class="list-group list-group-flush">
          <li class="list-group-item"><strong>Release Date : </strong><%= movie.release_date.strftime('%d-%b-%Y') %></li>
          <% if movie.watched? %>
            <li class="list-group-item"><strong>Watched On : </strong><%= movie.watched_date.strftime('%d-%b-%Y') %></li>
          <% end %>
      </ul>
      <div class="card-body">
        <%= link_to 'Show', movie, class: "card-link", style: "color: #800080;" %>
        <%= link_to 'Edit', edit_movie_path(movie) , class: "card-link", style: "color: #800080;" %>
        <%= link_to 'Delete', movie, method: :delete, data: { confirm: 'Are you sure?' }, class: "card-link" , style: "color: #800080;" %>

      </div>
    </div>
  <% end %>
</div>

<br/>
- Update file
app/views/movies/index.html.erbto the following HTML.
<p id="notice"><%= notice %></p>

<% if Movie.yet_to_watch.length > 0 %>
  <%= render 'movies/card_section_title', section: "Your Movies Watchlist" %>
  <%= render 'movies/movie_cards', movies: Movie.yet_to_watch %>
<% end %>

<% if Movie.watching.length > 0 %>
  <%= render 'movies/card_section_title', section: "Movies You Are Watching Now" %>
  <%= render 'movies/movie_cards', movies: Movie.watching %>
<% end %>

<% if Movie.watched.length > 0 %>
  <%= render 'movies/card_section_title', section: "Movies You Watched" %>
  <%= render 'movies/movie_cards', movies: Movie.watched %>
<% end %>


<br>

<%= link_to 'New Movie', new_movie_path , class: "btn theme-btn" %>
- Add
Create New Movielink in navigation barapp/views/layouts/_navbar.html.erb
<style>
  .theme-color {
    background-color: #800080;
  }
  .theme-btn {
    border-color: #800080;
  }
  .theme-font {
    color: #800080;
  }
</style>

<nav class="navbar navbar-expand-lg navbar-dark theme-color">
  <div class="container-fluid">
    <a class="navbar-brand" href="/">Binged</a>
    <button class="navbar-toggler" type="button" data-bs-toggle="collapse" data-bs-target="#navbarNavAltMarkup" aria-controls="navbarNavAltMarkup" aria-expanded="false" aria-label="Toggle navigation">
      <span class="navbar-toggler-icon"></span>
    </button>
    <div class="collapse navbar-collapse" id="navbarNavAltMarkup">
      <div class="navbar-nav">
        <a class="nav-link active" aria-current="page" href="/movies">Movies</a>
        <a class="nav-link active" aria-current="page" href="/movies/new">New Movie</a>
      </div>
    </div>
  </div>
</nav>
- After Styling Movies Index Page, It finally looks like this :)
Hope you enjoyed this tutorial...!!
Find out the complete code in Github here. If you like this, please give star for this Github repository.
Thank you for reading
Hope you find these resources useful. If you like what you read and want to see more about system design, microservices, and other technology-related stuff... You can follow me on
Twitter - Follow @vishnuchi